Spread 表格控件在业内以强大的 Excel 兼容性著称,并且广泛应用于制作报表。在日常工作中,经常需要使用 excel 制作交叉报表,Excel 交叉报表的左上角单元格斜线通过 Excel 单元格斜边框制作。那么,在Spread中是否可以实现这样的效果呢?在篇文章中,我们将阐述如何在 Spread 中添加斜线实现交叉报表中的表头效果。
Spread 边框虽然没有斜线边框,但是 Spread 提供了丰富的图形功能,不仅可以组织UI布局同时也支持打印、导出到 excel 。在本篇文章中我们将使用 LineShape 模拟该效果。
1.向 Spread 中添加 LineShape 的方法如下:
1: FarPoint.Win.Spread.DrawingSpace.LineShape lShape =
new FarPoint.Win.Spread.DrawingSpace.LineShape();
2: lShape.Name = "line";
3: lShape.Top = 0;
4: lShape.Left = 0;
5: lShape.Thickness = 5;
6: lShape.ShapeOutlineColor = Color.Red;
7: this.fpSpread1.Sheets[0].AddShape(lShape);
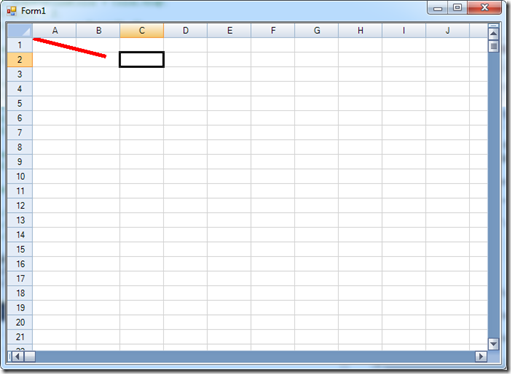
效果如下:
2.通过计算单元格的长度和宽度来计算 LineShape 的起始位置和角度:
1: private Rectangle CaculateRectangle(int startRowIndex, int startColIndex
, int endRowIndex, int endColIndex)
2: {
3: float height = 0;
4: float width = 0;
5: for (int i = startRowIndex; i <= endRowIndex; i++)
6: {
7: height += this.fpSpread1.Sheets[0].Rows[i].Height;
8: }
9:
10: for (int i = startColIndex; i <= endColIndex; i++)
11: {
12: width += this.fpSpread1.Sheets[0].Columns[i].Width;
13: }
14: Rectangle cellRec = this.fpSpread1.GetCellRectangle(0, 0, startRowIndex, startColIndex);
15: Point startPositoin = new Point(cellRec.Left - (int)this.fpSpread1.Sheets[0].SheetCorner
.Columns[0].Width, cellRec.Top - (int)this.fpSpread1.Sheets[0].SheetCorner.Rows[0].Height);
16:
17: Rectangle rec = new Rectangle(startPositoin, new Size((int)width, (int)height));
18:
19: return rec;
20: }
3.通过设置 SetBounds 方法设置 LineShape 位置信息:
1: FarPoint.Win.Spread.DrawingSpace.LineShape line =
new FarPoint.Win.Spread.DrawingSpace.LineShape();
2: line.Name = "mark";
3: line.ShapeOutlineColor = Color.Gray;
4: line.Width = 2;
5: line.Location = new Point(0, 0);
6:
7: Rectangle rec = CaculateRectangle(0, 0, 2, 1);
8: line.SetBounds(rec);
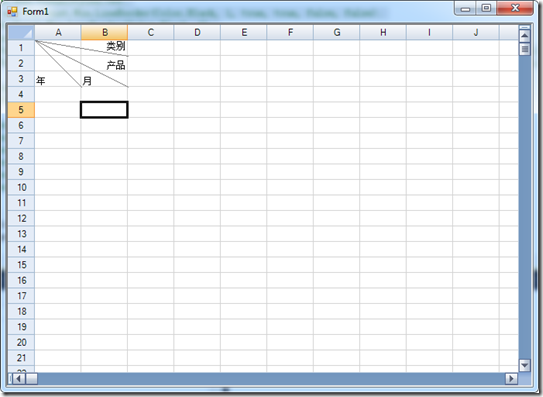
以上即为设置的核心代码。使用以上方法即可实现以下效果:
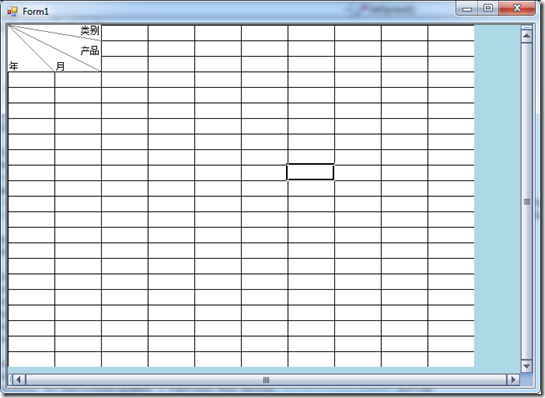
隐藏表头及设置边框后可实现以下效果:
Demo 下载:VS2010 && Spread for Winforms 7.0 && .NET 4.0 && C# 点击下载
