[]
之前为您介绍过在后台管理中获取 Token(令牌)然后进行 URL 集成的方法,详见生成令牌。
这种方法使用起来非常方便,我们可以将带有 Token 的 URL 发给任何人,对方即可直接打开查看文档或登录站点。但它的便利性也带来了一定的安全方面的担心,因为它将Token (即令牌)显示在 URL 中。这对于那些对文档或站点的机密性要求较高的企业来说,就不够安全和友好了。
为了进一步解决和满足这些对安全性要求更高的场景,我们支持了使用 authToken 进行集成的方式(https://<domain>/integration/?authToken=<authToken>)。
这种集成方式需要调用 API 来获取 authToken,然后将 authToken 添加到 URL中,形成最终集成用的完整 URL。
当最终用户在浏览器中访问该 URL 时,Wyn 服务器会在响应中设置 token cookie 头,浏览器会自动存储该 cookie。并且您可以在生成 authToken 时设置它的过期时间。
由 authToken 解析为 cookie 的行为只能进行一次,所以之后用户将不能在其他浏览器中再次访问该URL,也不能将其发送给其他浏览器查看,从而大大提高了安全性。
接下来就为您介绍authToken 集成的具体过程。
1. 打开站点页面
比如文档站点首页。

2. 通过 API 获取 authToken
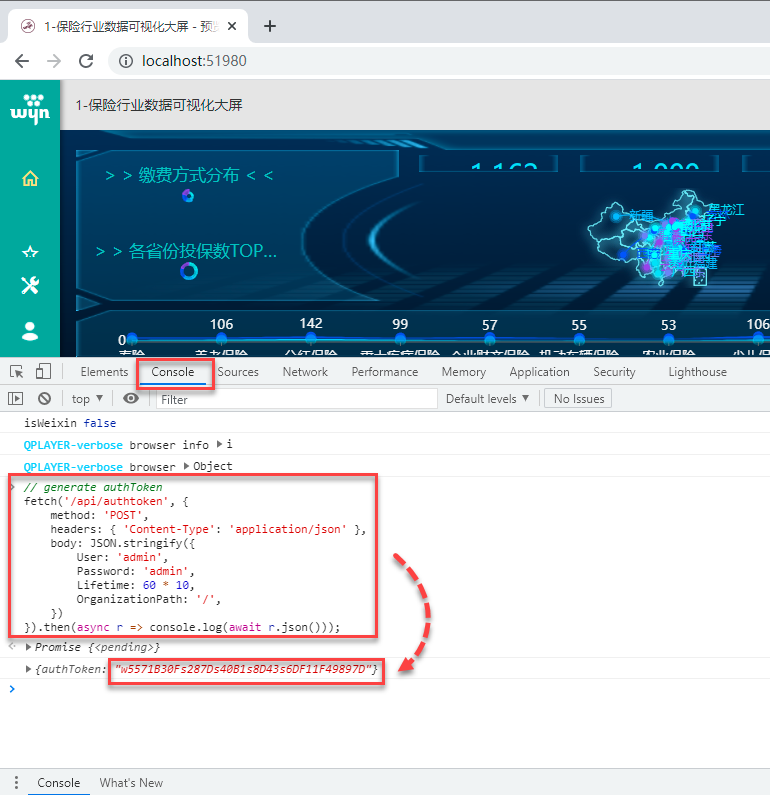
具体操作为:按下键盘 F12,打开调试窗口。 将如下代码粘贴到 Console 中,回车得到 authToken。
// generate authToken
fetch('/api/authtoken', {
    method: 'POST',
    headers: { 'Content-Type': 'application/json' },
    body: JSON.stringify({
        User: 'admin',
        Password: 'admin',
        Lifetime: 60 * 10,
        OrganizationPath: '/',
    })
}).then(async r => console.log(await r.json()));
获取 authToken 的代码中有如下参数可设置:
参数 | 说明 |
|---|---|
User | 用户名 |
Password | 该用户的登录密码 |
Lifetime | authToken 的过期时间。 单位为“秒”。60*10 代表10分钟。 表示向Wyn 站点发出请求后,约10分钟后过期,会强制退出站点。 |
OrganizaitonPath | 组织路径。比如 '/Org1/sub1'。 我们使用 '/' 表示全局组织。 |
注意
系统后台服务每小时清理一次authToken,三天内未使用的authToken将被删除掉。
3. 将 authToken 添加到 URL 中组成完整的集成 URL
完整URL的格式为:https://<domain>/integration/?authToken=<authtoken>(其中 “authToken” 大小写不敏感)
因此示例中完整的URL为:http://localhost:51980/integration/?authtoken=w5571B30Fs287Ds40B1s8D43s6DF11F49897D
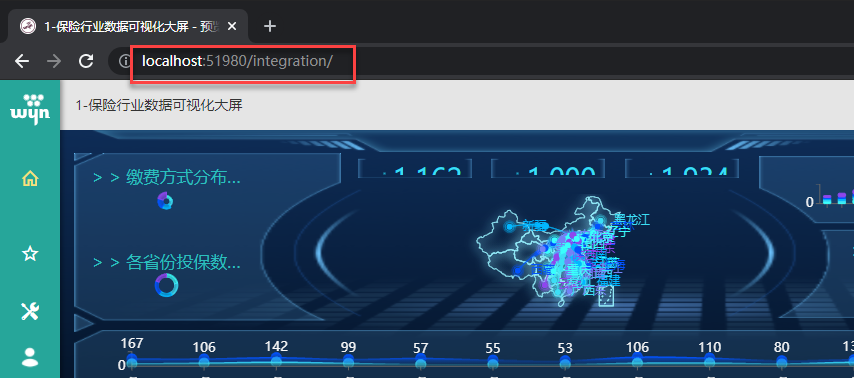
在其他浏览器或无痕窗口中访问该URL,回车后会显示为 http://localhost:51980/integration/。

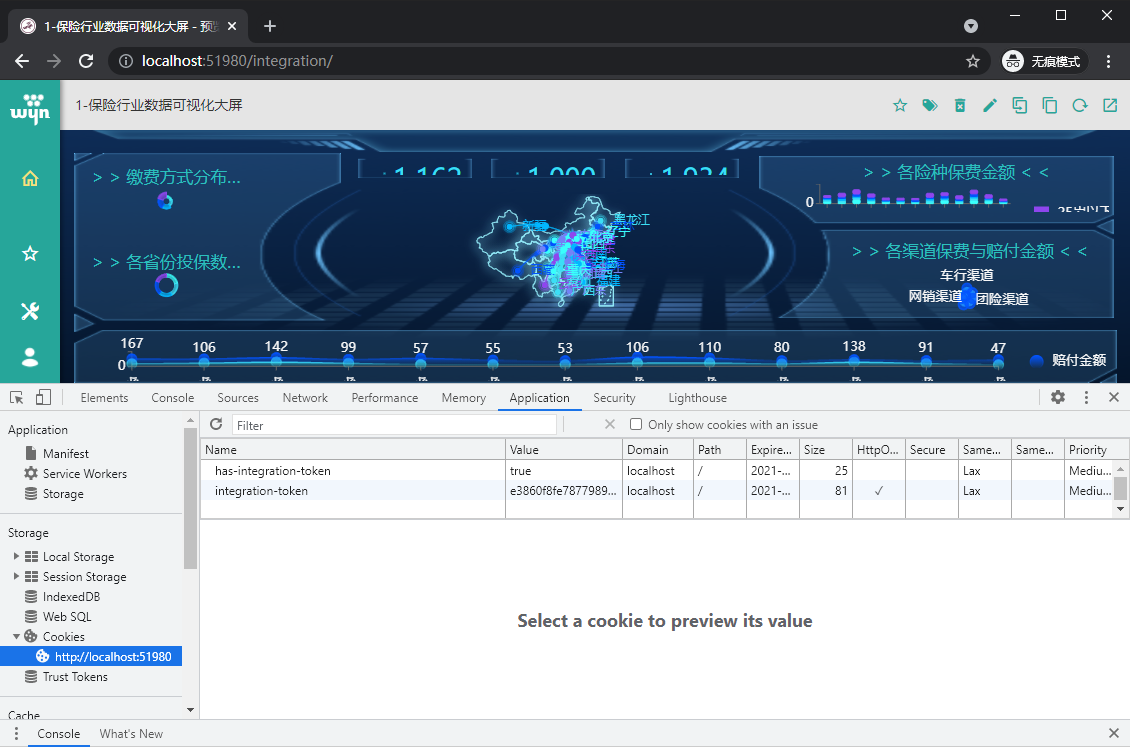
按下健盘F12 ,在调试窗口的 Application 页面可见浏览器访问URL时,将 authToken 实际转换成为了Cookie。

之后,我们再将URL转发其他人或者用其他浏览器打开会无法访问。因为由 authToken 解析为 cookie 只能进行一次。
示例中我们使用的是文档门户地址,直接在原URL后边添加 /integration/?authToken=<authToken>。
而在集成其他页面时,除了域名外还会有其他参数,此时请注意将“ integration ”添加到域名后,紧临域名,然后将“ /?authToken=<authToken> ” 添加到 URL末尾。
在集成后台管理网站时,则不需要添加 “ integration ” 参数,直接在URL末尾添加 “ /?authToken=<authToken> ” 即可。
示例:
页面 | 原页面URL | 集成URL |
|---|---|---|
文档门户首页 |
|
|
在文档门户预览仪表板 |
|
|
后台管理的某一页面 |
|
|