| Wijmo User Guide > Concepts > ThemeRoller |
One of the most convenient features of Wijmo is its ThemeRoller compatibility. ThemeRoller is a Web application for creating unique jQueryUI themes to skin your Web widgets. With its simple interface and WYSIWYG preview, you can create a skin for all of your Wijmo widgets and other ThemeRoller-compatible widgets in less time than it would take to open a graphic editor.
We can find the ThemeRoller Web app at jqueryui.com/themeroller. Once you've arrived at the app, take a gander at the column on the left-hand side of the page and observe that it holds three tabs: Roll Your Own, Gallery, and Help.

Roll Your Own is where the magic happens. From this tab, we have the power to tweak your theme to perfection. To change an element, all we have to do is expand a node and get to work.
Clicking the Gallery contains a list and preview of ThemeRoller's premium themes. From here, we can preview, download, or edit one of the ready-made themes in the following ways:
Clicking the Help tab will give us a quick reference and special information regarding the ThemeRoller, such as information for plugin developers and browser support notices.
In this quick guide, we'll walk through the process rolling your own theme and adding it to a Wijmo project.
First, we have to visit the ThemeRoller Web app by following this link: jqueryui.com/themeroller.
From this point, we have a couple of choices. We can roll a theme using the generic gray default theme, or we can choose a theme to edit from the Gallery tab. For this quick start, we're going to choose a theme, so we have to click theGallery tab and click Edit to edit a theme of our choosing. For this tutorial, we're going to click the Edit button under theHot Sneaks theme.
ThemeRoller loads the theme and returns to the Roll Your Own tab. This is Hot Sneaks, the theme we're going to modify in the next section:

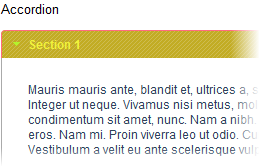
Hot Sneaks is a spiffy theme, but the pink color on the active clickable areas is a little too Barbie-goes-to-a-bachelorette-party to use for a professional site. I know – let's make it the color of spicy mustard instead!
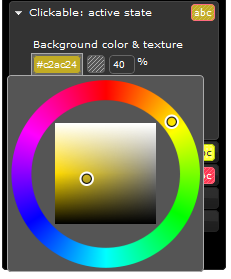
To change the color of the active clickable areas, we have to expand the Clickable: active state node and enter "#c2ac24" into the first Background color and texture field and press ENTER.

Alternatively, we can play around with the color picker until you find the perfect shade. Either way, it should look a bit like this:

Looks good, eh? But that border is still pink, and it would look far more attractive in that rust color that was worn by every shag carpet in the 1970s. To achieve that color, we just enter "#d0590b" into the Border field and press ENTER. And, while we're at it, we may as well go ahead and change the text and the icon of the clickable: active state too. Enter "#f1f23a" into the Text field and "#b0f22c" into the Icon field.

Ooooh, the pretties:

Guess we're done here.
Wait!
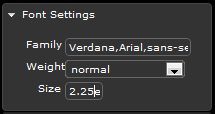
What we're working on is important to the company - so important that we should make the font really, really BIG so that everyone knows how important it is. To do this, we expand the Font Settings node and, in the Size field, enter "2.25em" and press ENTER.

Perfect. Now that we're done, we're ready to download our custom theme. First we'll need to click the orange Download theme button to load the Build Your Download page. Then, we navigate to the light orange panel, select the Themeand Version settings, and click Download to download the custom theme in a zip file.
Now that our theme is downloaded, we can add it to a Wijmo widget. We'll add it to a wijaccordion.
First we have to create a Wijmo project containing a wijaccordion widget. The best way for us to figure out how to do that would be to visit the Getting Started with Wijmo|document=Documents\GettingStarted.doc;topic=Getting Started with Wijmo topic, but we'll just pretend we've already read the documentation and plow forward.
Okay, so now we (theoretically) have a Wijmo project bearing a wijaccordion control, and all we need to do is theme it. In our project folder, we'll create a folder called Themes and extract the zip folder containing the theme files into it. The following items will be present in our folder:
If we open the css folder and then the custom-theme folder, we'll see the CSS file and an images folder.
Now all we have to do is link to the theme's CSS file from within the project's HTML file by adding the following reference statement:
<link href="Themes\css\custom-theme\jquery-ui-1.8.13.custom.css" rel="stylesheet" type="text/css" />
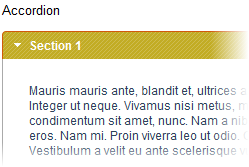
Now we just have to save the file and open it to see the result of our handiwork.

Okay, so this theme is admittedly not the best looking kid in class, but it served the purposes of the tutorial. And if you put a few minutes of effort into it, you can create theme magic with the ThemeRoller Web app. The Wijmo team is looking forward to seeing what you come up with.
Happy theming!