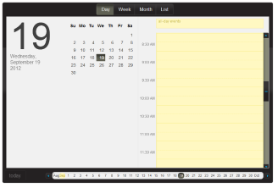
This quick start helps you to create a Web page, add the wijevcal widget, and customize the appearance and behavior of the widget.
- To create a new HTML page in your favorite text editor, add the following code and save the document with an .html extension.
Drop down and copy markup to paste in Notepad
| Paste in Notepad. |
Copy Code
|
<!DOCTYPE HTML>
<HTML>
<head>
</head>
<body>
</body>
</HTML>
|
- Add links to the dependencies to your HTML page within the <head> tags. Find the latest dependencies in the content delivery network (CDN) file at wijmo cdn.
Drop down and copy references to paste inside the head tags
| References |
Copy Code
|
<!--jQuery References-->
<script src="http://code.jquery.com/jquery-1.9.1.min.js" type="text/javascript"></script>
<script src="http://code.jquery.com/ui/1.10.1/jquery-ui.min.js" type="text/javascript"></script>

<!--Theme-->
<link href="http://cdn.wijmo.com/themes/aristo/jquery-wijmo.css" rel="stylesheet" type="text/css" />

<!--Wijmo Widgets CSS-->
<link href="http://cdn.wijmo.com/jquery.wijmo-pro.all.3.20132.15.min.css" rel="stylesheet" type="text/css" />

<!--Wijmo Widgets JavaScript-->
<script src="http://cdn.wijmo.com/jquery.wijmo-open.all.3.20132.15.min.js" type="text/javascript"></script>
<script src="http://cdn.wijmo.com/jquery.wijmo-pro.all.3.20132.15.min.js" type="text/javascript"></script> |
- Place the following markup within the <body> tags.
Drop down and copy markup to paste inside the body tags
| Paste inside the body tags. |
Copy Code
|
| <div id="eventscalendar"></div> |
The <div> element creates the widget, and its id option is set to 'eventscalendar', which we call in the jQuery script to initialize the widget. This markup adds a fully functioning events calendar to your page.
-
Within the <head> tags, below the references, add the following script to initialize the jQuery widget.
Drop down and copy markup to paste inside the head tags
| Paste inside the head tags. |
Copy Code
|
<script type="text/javascript">
    $(document).ready(function () {
       $("#eventscalendar").wijevcal({
    timeInterval: 15,
    timeIntervalHeight: 30,
    timeRulerFormat: "{0:h:mm tt}",
    timeRulerInterval: 30
    });
    });
</script>
|
This script sets several events calendar widget options.
- The time interval offers room for an event every 15 minutes instead of every 30 minutes.
- The time slots are each 30 pixels high instead of 15 pixels.
- The ruler formatting shows minutes, so that when we set the ruler interval to every 30 minutes, it shows more than just the hour.
- The ruler interval shows every half hour instead of every hour.
- Save your HTML file and open it in a browser. The wijevcal widget appears like the following:

EventsCalendar
|
See Also
Reference

