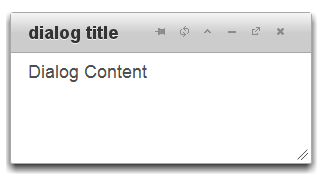
In this quick start, you will learn how to add the Dialog widget to an HTML project and how to customize the widget.
- Create an .html page and add links to the dependencies to your project. To do this, just link to the content delivery network (CDN) file for each project:
Drop down and copy references to paste inside the head tags
| References |
Copy Code
|
<!--jQuery References-->
<script src="http://code.jquery.com/jquery-1.9.1.min.js" type="text/javascript"></script>
<script src="http://code.jquery.com/ui/1.10.1/jquery-ui.min.js" type="text/javascript"></script>

<!--Theme-->
<link href="http://cdn.wijmo.com/themes/aristo/jquery-wijmo.css" rel="stylesheet" type="text/css" />

<!--Wijmo Widgets CSS-->
<link href="http://cdn.wijmo.com/jquery.wijmo-pro.all.3.20132.15.min.css" rel="stylesheet" type="text/css" />

<!--Wijmo Widgets JavaScript-->
<script src="http://cdn.wijmo.com/jquery.wijmo-open.all.3.20132.15.min.js" type="text/javascript"></script>
<script src="http://cdn.wijmo.com/jquery.wijmo-pro.all.3.20132.15.min.js" type="text/javascript"></script> |
You can reference the latest dependencies from the CDN at wijmo cdn.
-
Place the following markup within the <body> tags.
Drop down and copy markup to paste inside the body tags
| Paste inside the body tags. |
Copy Code
|
<div id="dialog" title="Basic dialog">
</div>
|
- To initialize the widget, you need to add some jQuery script.
Drop down and copy markup to paste inside the head tags
| Paste inside the head tags. |
Copy Code
|
<script id="scriptInit" type="text/javascript">
      $(document).ready(function () {
          $('#dialog').wijdialog({
              autoOpen: true,
              captionButtons: {
                  refresh: { visible: false}
              }
          });
      });
   </script>
|
- If you run your application now, the wijbarchart will resemble the following image:

See Also
How To
Reference

